How to:
Create a Regular event
1. click here or log-in to your Universe account and click the ‘Create Event’ button located at the top of your screen.

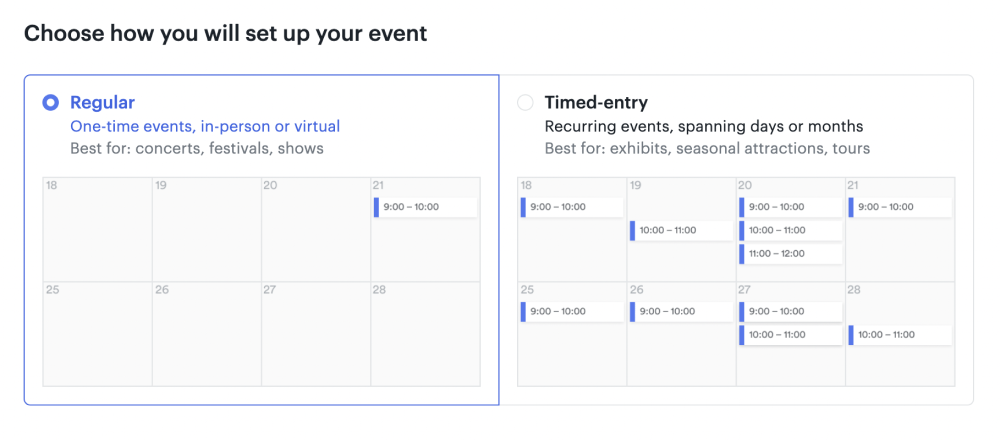
2. On the following page, select the Regular option, and click continue.
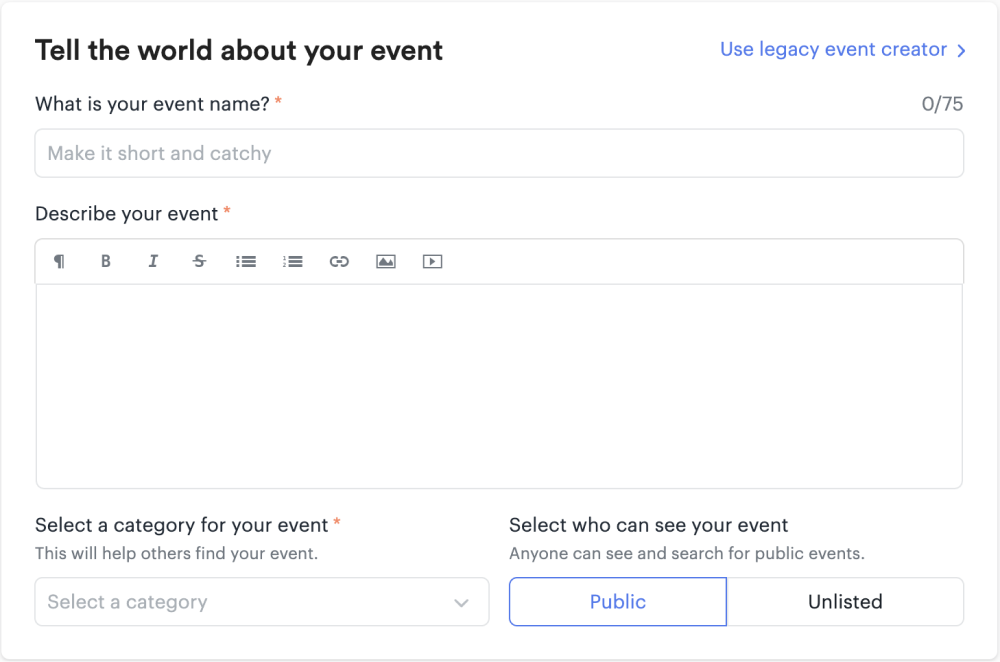
3. You will then be re-directed to the event creation form. Enter your basic information here:
What is your event name?: Enter the name of your event. The field is limited to a maximum of 75 characters.
Describe your event: Include any details you would like your attendees or customers to know and set expectations/restrictions. Use the tool bar above the Description field to customize formatting, add links, photos, videos, etc.
Add a category: Select a category from the dropdown menu that best represents your event.
Who can see your event: By default, your event is listed as ‘Public’ and will be searchable through Universe’s directory and search engines. If you would like your event to be private, you can set your event to ‘Unlisted’, which means that only people with the event URL can see your event page. If your event is unlisted, you can hide social share button from your event.
4. When and where is your event?:
Date & Time: Use the dropdown date picker to set your event’s start and end times. Add as many dates as needed by selecting the ‘Add another date’ button. Use the ‘hide the date and time from showing on tickets’ toggle, if needed (only available if your event page has one date).
This is a virtual event: Select this toggle if you are creating a virtual event
Address: Enter the address of your event. This will show on your event page and tickets to your event.
Venue Name: You can set a venue name so that this shows up on your event page and tickets to your event.
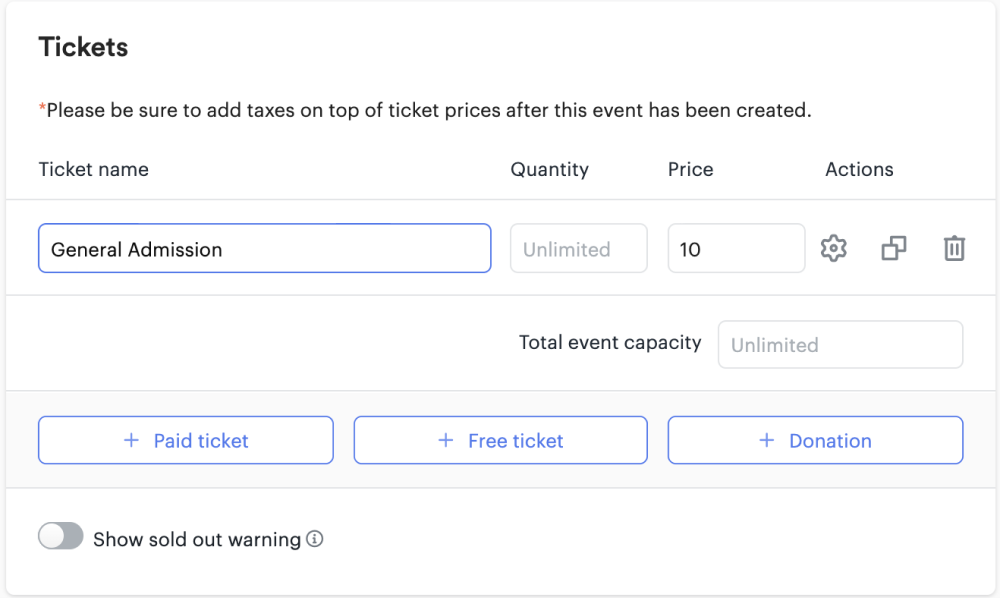
5. What tickets will you offer?:
Create as many ticket types as needed. Select either the ‘Paid’, ‘Free’, or ‘Donation’ button for each ticket type you would like to set up and enter the details of the ticket. Note: The quantity you enter will be the quantity available for each date that your event is occurring on.
To access the advanced settings for a ticket type, select the edit button (gear icon) beside the ticket and enter any desired information including a description, availability (ticket sales start and end time), minimum and maximum tickets per order, the status (available, hidden, or locked), and release time of tickets. Note: You can set a maximum event capacity for your event. The maximum capacity will indicate how many people can register for your event before it becomes sold out. The default capacity is the sum of the maximum quantities for each ticket type. However, you can change this to limit the total number of tickets available across all ticket types. If you would like to display a sold out warning, you can do so by toggling ‘Show show out warning’.
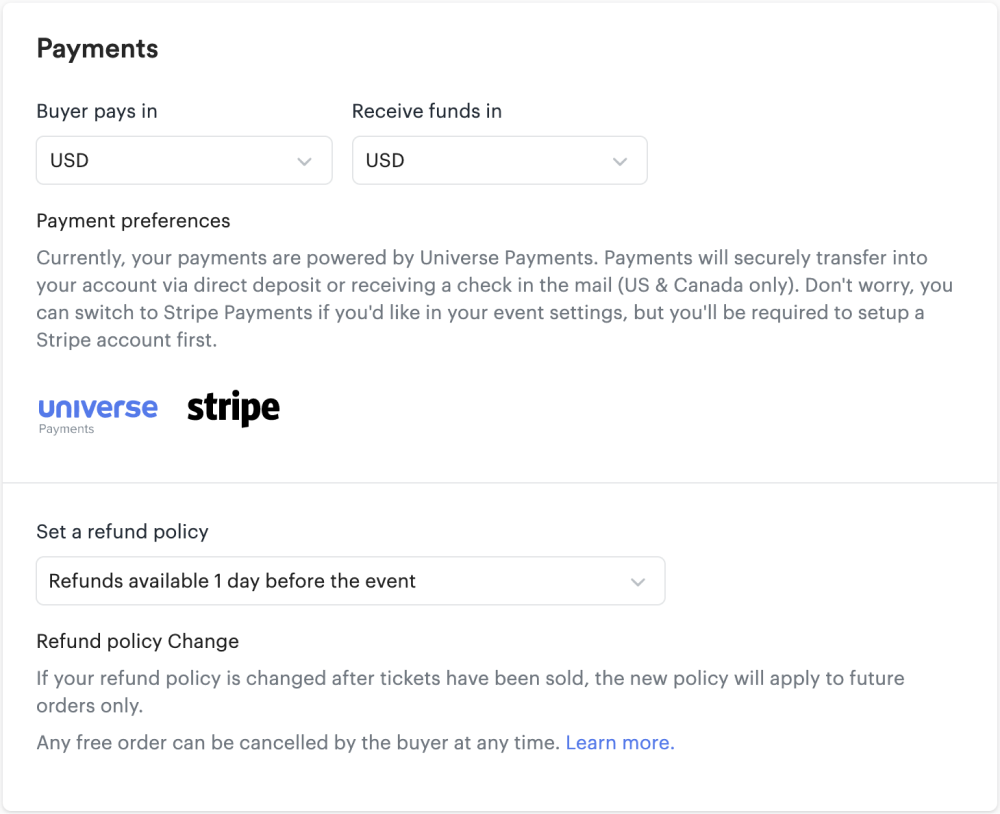
6. Set your currency and refund policy:
Currency: The display and transaction currency defaults based on the location of the event. Click on the currency to open a dropdown menu and change either the currency a buyer pays in or the currency you will receive funds in. For more information, please take a look at our guide: Customize your event’s display and transaction currency
Payment Preferences: Currently the default payment processor is set to be Universe Payments where your funds will become available 48 hours after the event has ended. If you would like to change to Stripe Payments, you can do so in your event settings. You can learn more about our payment processors here.
Set a refund Policy: Set a refund policy for your event. This will show at checkout and on the order summary. If your refund policy is changed after tickets have been sold, the new policy will apply to future orders only.
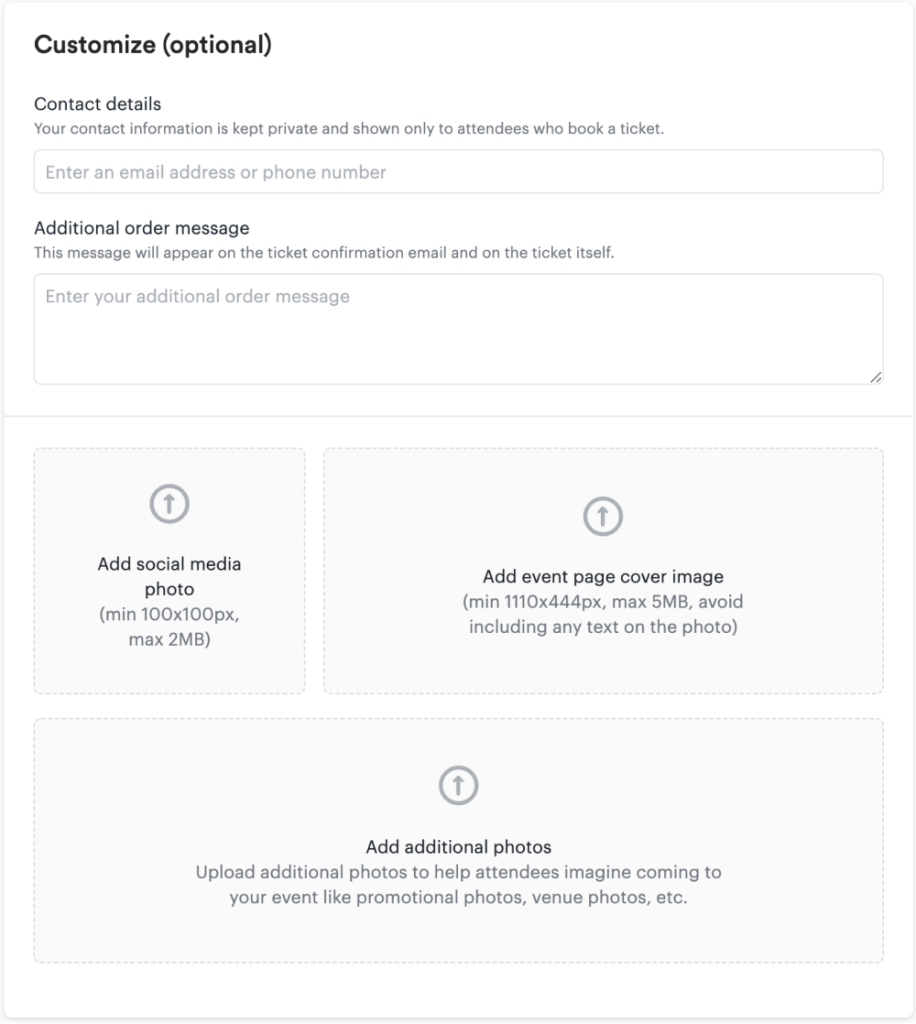
7. Customize (optional):
Contact details: You can add contact details that will only be shown to attendees who have booked a ticket.
Additional Order Message: You can enter a note that will only show to confirmed buyers. This note will be displayed in the buyer’s confirmation email and in their ticket. This note is never displayed publicly on your event page.
Photos: If you have uploaded an image on this page, that image will appear on your event display page – if not we will randomly assign an image to you, which you can always go back and edit later.
8. Publish Event:
Select ‘Publish now‘ to make your event live immediately on universe.com and within 2 hours on consciouscityguide.com and allow buyers to book tickets.
Select ‘Schedule‘ to make your event live at a later date and time.
Select the ‘Save as draft‘ button to create your event but not make it live. With all three options you can come back and make changes later on.
Note: You’ll need to confirm your account before you can ‘Publish’ your event listing. To do so, check your email for a message with the subject “Events await! Please confirm your account” and then click ‘confirm email’.
If you would like to change any of your event details, simply click on the step at the top of your screen and you will be taken back to that page.

Once your event page is created, you’ll be redirected to your event’s Manage Page to access advanced settings that allow you to easily manage and promote your event.
On Your Event Day:
You can download and print your event guest list to manage check-ins at the door. Additionally, you can use BoxOffice(formerly known as TicketManager), our free at-the-door app. BoxOffice(formerly known as TicketManager) allows you to scan tickets, check-in attendees, and sell tickets at the door.